RHEL 6 Installation step by step
- Enter into BIOS setting and make CD/DVD Drive as first boot device
- Make sure that VT (Virtual Technology) is enabled for RHEL6-64 bit systems
- Insert the RHEL 6 CD/DVD into CD/DVD drive and boot the system
- If booted from CD/DVD Rom the following screen will be displayed
- Move the cursor to Install or upgrade an existing system and press Enter
- To test the media select OK, to skip the testing move cursor to Skip and press enter
- Click on Next button to move forward
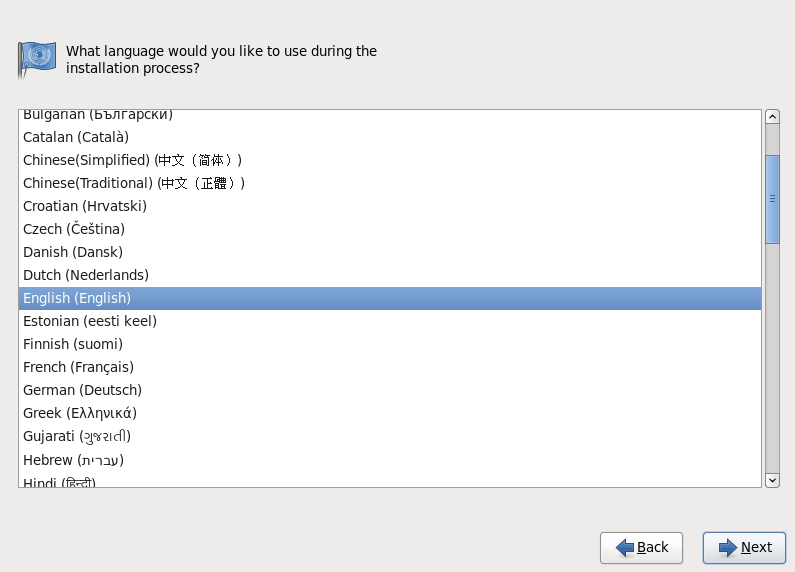
- Select your desired language, usually English. Click Next to continue
- Select the keyboard type as required usually U.S English, click Next to continue
- Select the type of storage for the Computer. Click Next to continue
- Assign a hostname to the system, if wish to give ip address click on Configure Network, else Click Next to continue
- Select the nearest city in your Time Zone and Click on Next to continue
- Assign some password for root, then click on Next to continue
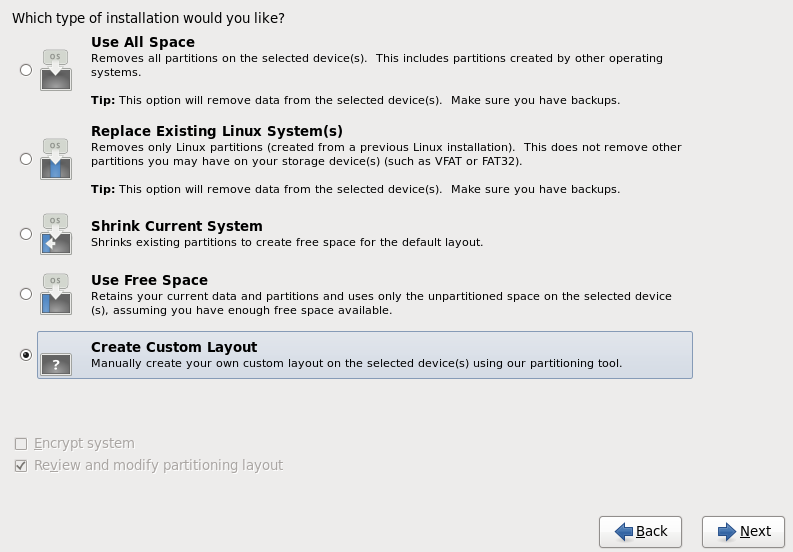
- Select the type of partitioning you want, to create your own partitions with custom sizes, select Create Custom Layout and click on Next to continue
- Click on the Free space, then click on Create to create your own partitions
- Check the box beside Standard Partition, Click on Create to continue.
- Select / from Mount Point Box, give the size you wish for it and click on OK to create it.
- Select the Free space again and click on Create to create another partition. Also Check the box beside Standard Partition, Click on Create to continue
- Select /boot from Mount Point Box, give the size 200 MB for it and click on OK to create it.
- Repeat the same steps and create swap space
- This time select swap from File System Type, give the size required and click on OK
- Verify the partition and click on Next to continue with it.
- Click on Write changes to disk to continue, if wish make changes click on Go back.
- To change the name of boot loader select Edit and assign new name to it.
- To assign password to boot loader check the box beside Use boot loader password and assign a password to it.
- To keep all as default, just click on Next button to continue.
- Select Desktop to have a graphical environment in RHEL6.
- Check Customize later to install additional software later. Click on Next to continue
- Now sit back and relax until the installation is completed.
- When above prompt is displayed, remove the CD/DVD from the drive and click on Reboot to reboot the system.
- Click on Forward to move to next step.
- Accept the license agreement and click on Forward to continue
- click Forward
- Give a name to create a user and assign it a password. Click on Forward to continue.
- Set the date and time and click on Forward to continue
- Click on Finish and congratulation your installation is now completed.
- Login using either Suresh or root user.


No comments:
Post a Comment